Electronics
Unpack your two Raspberry Pi-es for your weather outposts and two sense HAT shields.
For this step, you need a cross head screwdriver.
Install your sense HAT shields to you two Raspberry Pi-s.
- Screw in the standoffs onto your sense HAT.
- Connect the sense HAT to your Raspberry Pi and screw in the last screws.


For this step, you should unpack your touchscreen display and your last Raspberry Pi and a screwdriver.
You should have some assembly already done from the factory. There should be a board on the back of the display with a small ribbon cable connected from display to the connector on the top of the board. If that is not the case you should connect the small ribbon cable to the small connector on top of the board.
Take out your four wires and your one ribbon cable.
- Screw in the standoffs onto your touchscreen shield
- Connect the ribbon cable. From the seven-inch display to your Raspberry Pi.
- Look at the following pin layout and connect the wires to their location. The color of the wires does not matter.


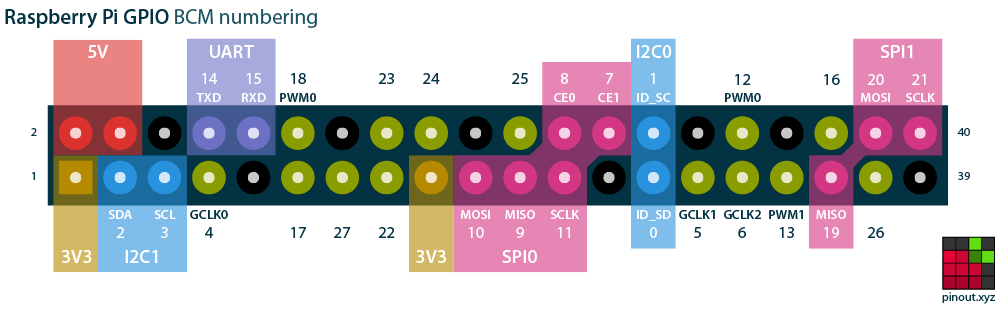
For this example, black was used for GND and red for 5V output. Yellow for SCL and Green for SDA.
- GND: pin 6
- 5V: pin 2
- SCL: pin 5
- SDA: pin 3